Have you ever looked at a roller coaster and thought, I wish I could design my own! Today is your lucky day, this STEM challenge is an inexpensive, simple and fun activity.
Did you know roller coasters are all about physics? They rely on gravitational potential energy, which is gained by going up a large hill. When the coaster then goes downhill, the potential energy is then converted to kinetic energy. Some energy is also converted to heat due to heat and air resistance with the track, which slows the coaster down. This process continues as it goes through the loops, hills, and turns, eventually stopping.
Keep in mind these factors with your DIY roller coaster! Make sure your marble has enough potential energy to make it through the whole track! Ready, set, lets roll on this roller coaster challenge.
Materials Needed
- Paper
- Tape
- Scissors
- Ruler
- Pencil
- Corrugated Cardboard
- Marble
Step 1

To begin we need to build the structure of the coaster! Grab a sheet of paper and draw 4 lines about 1/4 inch apart. This will be your guide to fold on.
Step 2

Begin folding along the lines until you have a cylinder shape. Once it is folded, overlap the two ends and glue them together. Then, you will need to cut each drawn line about an inch. ( It should now look like a folded crease) Repeat this step to have 2 total.
Step 3

Grab another sheet of paper and draw half-inch intervals about 1/2 inch apart. Begin cutting along the lines. Then flip it on the other side and bend the cut pieces. Each tab of paper will now be folded in half to create the border of the coaster (keep that marble from flying off the edge).
Step 4

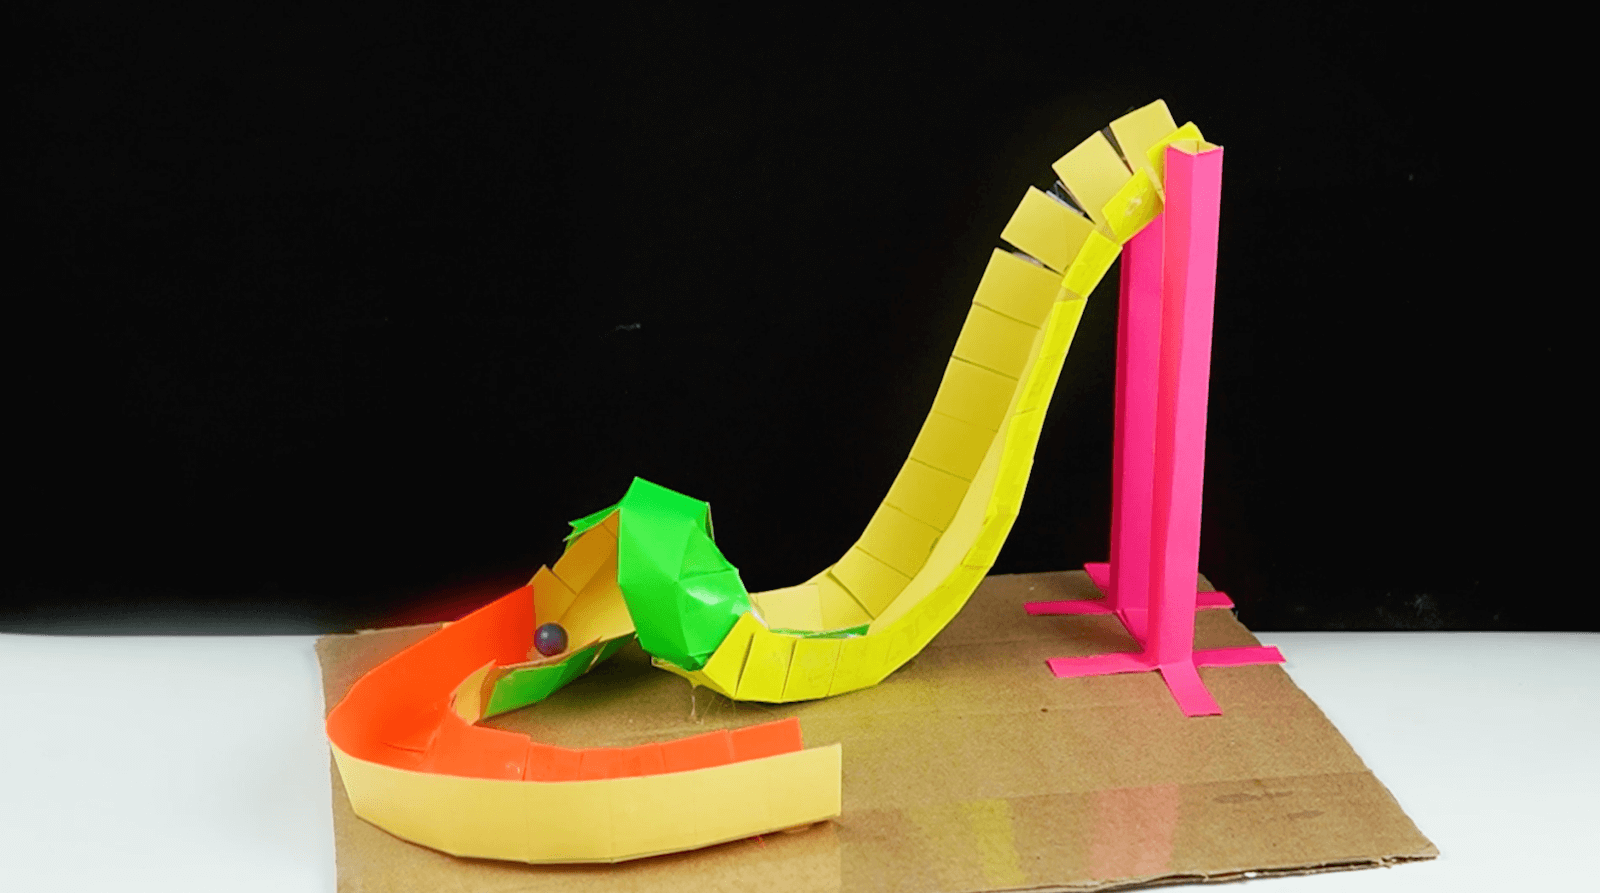
This part is more up to your imagination. How do you want your coaster to be? Is it spiral? It is curved? Is it double-curved? Gather the strips and begin taping how you want your coaster to go. You will also do this to create the hill.
Step 5

The best part about this challenge is you can make it however you want it! It can be large, it can be small, it can drop multiple times. ANYTHING!
Step 6

Last step before we get to try it out! Grab the cardboard and begin securing your DIY roller coaster to it! This will help keep a steady space. Let's test it out! If your marble doesn't make it down, try to figure out why. Make some adjustments and try again! Who wants to compete in the roller coaster challenge?

Leave a comment